Creating a firewall for USB is absolutely necessary if you want to protect your data contained in it when you temporarily cannot find a suitable storage location for it. In addition, creating a firewall for USB is also a way to help you protect your data in case someone wants to delete or change your data, and to create a firewall for USB, the only thing we need to do is use USB Disk Manager with the instructions below.

Create a firewall for USB
Instructions for creating a firewall for USB
Step 1: The first thing that Software often mentions before using software is to download and install them first. With USB Disk Manager, luckily users can run it always and do not need to install or download
Step 2: Although it does not have to be installed, after downloading USB Disk Manager users must unzip, which can be used
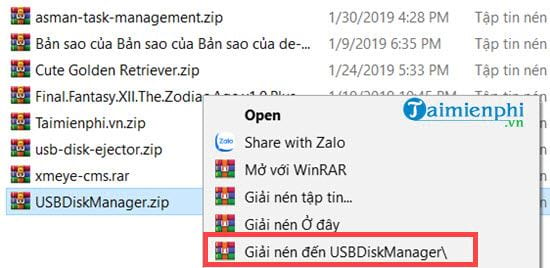
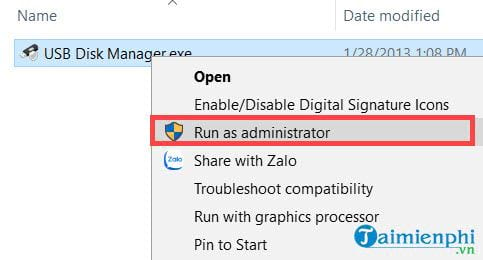
Step 3: Access the folder after extracting, where you right-click to select Run as Administrator.
Note: At this point or before, plug in the USB that you need to create a firewall for USB.
Step 4: The interface of USB Disk Manager appears in 4 parts, all 4 parts will directly affect the USB and just unplug the USB and plug it back in, all settings will be the same as in USB Disk Manager software.
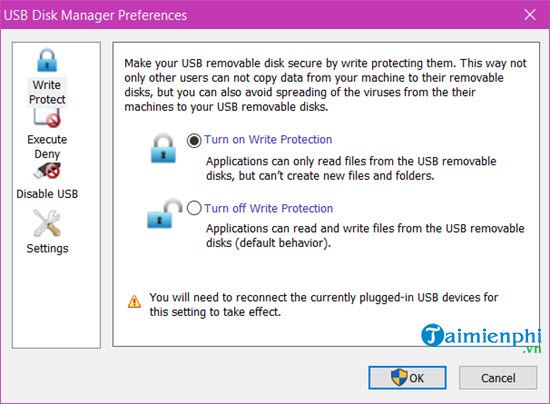
The first part is Write Protector, which allows protection, or in other words, this is the main feature when creating a firewall for USB. If you agree to enable Turn on Write Protection, all data written on the USB drive will not be able to be CUT, DELETE, RENAME. In addition, users cannot create anything new on the USB.
If you turn off Write Protection , everything will return to the state of a normal USB stick.
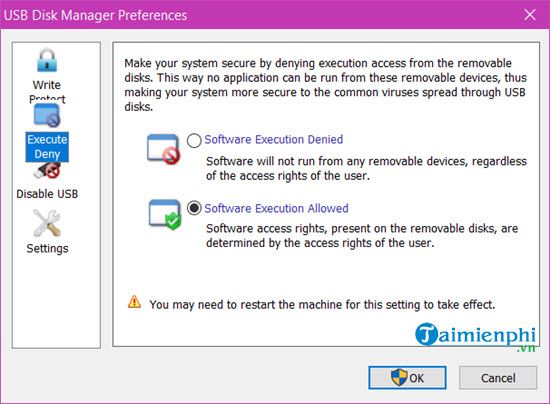
Step 5: The next section is Execute Deny with Software Excution Denied and Software Excution Allowed options. Basically, this is a feature that allows or refuses to run any application, program, tool from USB such as portable software or text files, Excel files.
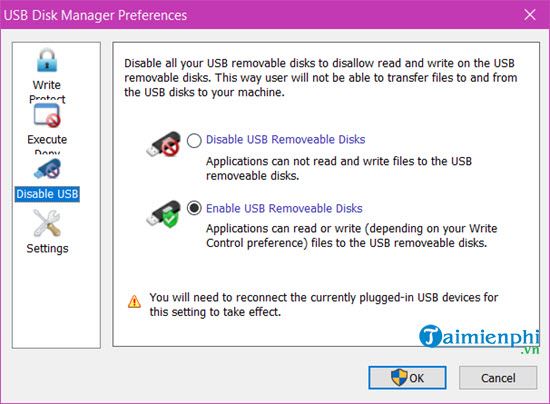
Step 6: Disable USB with 2 values: Disable USB removeable Disks and Enable USB removeable Disks. Users should consider this feature because after turning it off (Disable), it means that the entire USB port on your device will not work.
Step 7: Next to the last section is Settings, which is the section that establishes the associated features between the software and the device, with the operating system included.
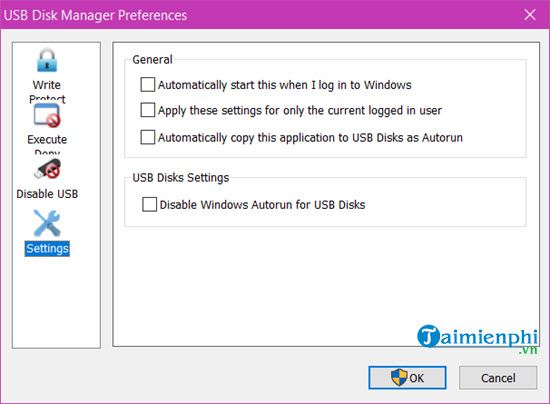
– General:
* Automatically starts when inside Windows.
* Allows keeping this setting applicable to the current User.
* Automatically copy applications to USB.
– USB Disk Settings:
* Turn off USB autoplay on Windows.
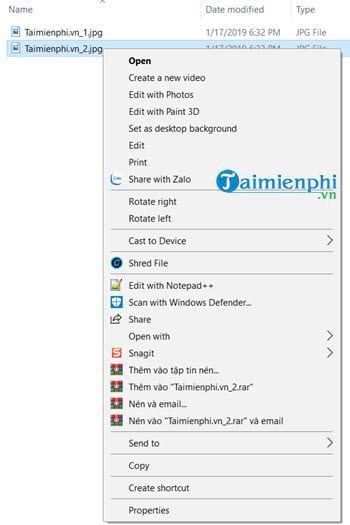
Step 8: To test, unplug the USB and plug it back in after setting up the above features, inside the USB will see that when right-clicking on the file has disappeared, the Delete, Cut, Rename boxes and using shortcuts are also not possible.
Thus, Software has just introduced features on USB Disk Manager, software that helps create firewalls for USB. Using USB Disk Manager is the best way to create a firewall for USB, creating an extremely strong defense against external threats.
There are many ways to protect your USB drive such as setting a password for it as a solution and each has its own advantages and disadvantages. With the way
https://thuthuat.taimienphi.vn/tao-tuong-lua-cho-usb-13651n.aspx
USB sticks infected with viruses will bring a lot of annoyance to you, some types also hide files in USB and to recover hidden files in USB is not easy if you do not know how to do it or have someone to give you specific instructions. If you encounter the above problem, the instruction